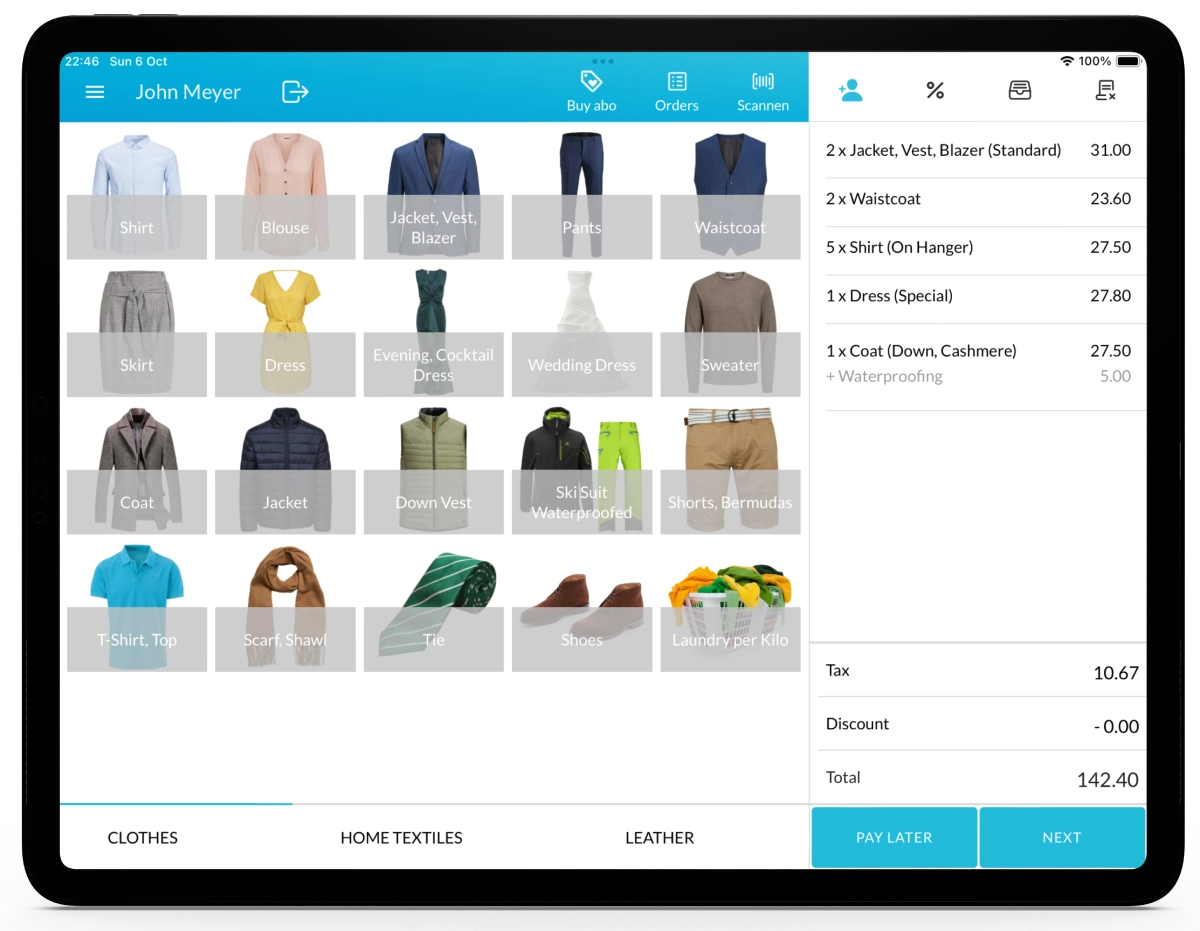
With Lagutta POS, you can easily register customers and add them to orders. This allows you to access customer order history, manage subscription plans, send order notifications, and, if the loyalty program is activated, allow customers to collect points.
Step-by-Step Guide to Registering a Customer
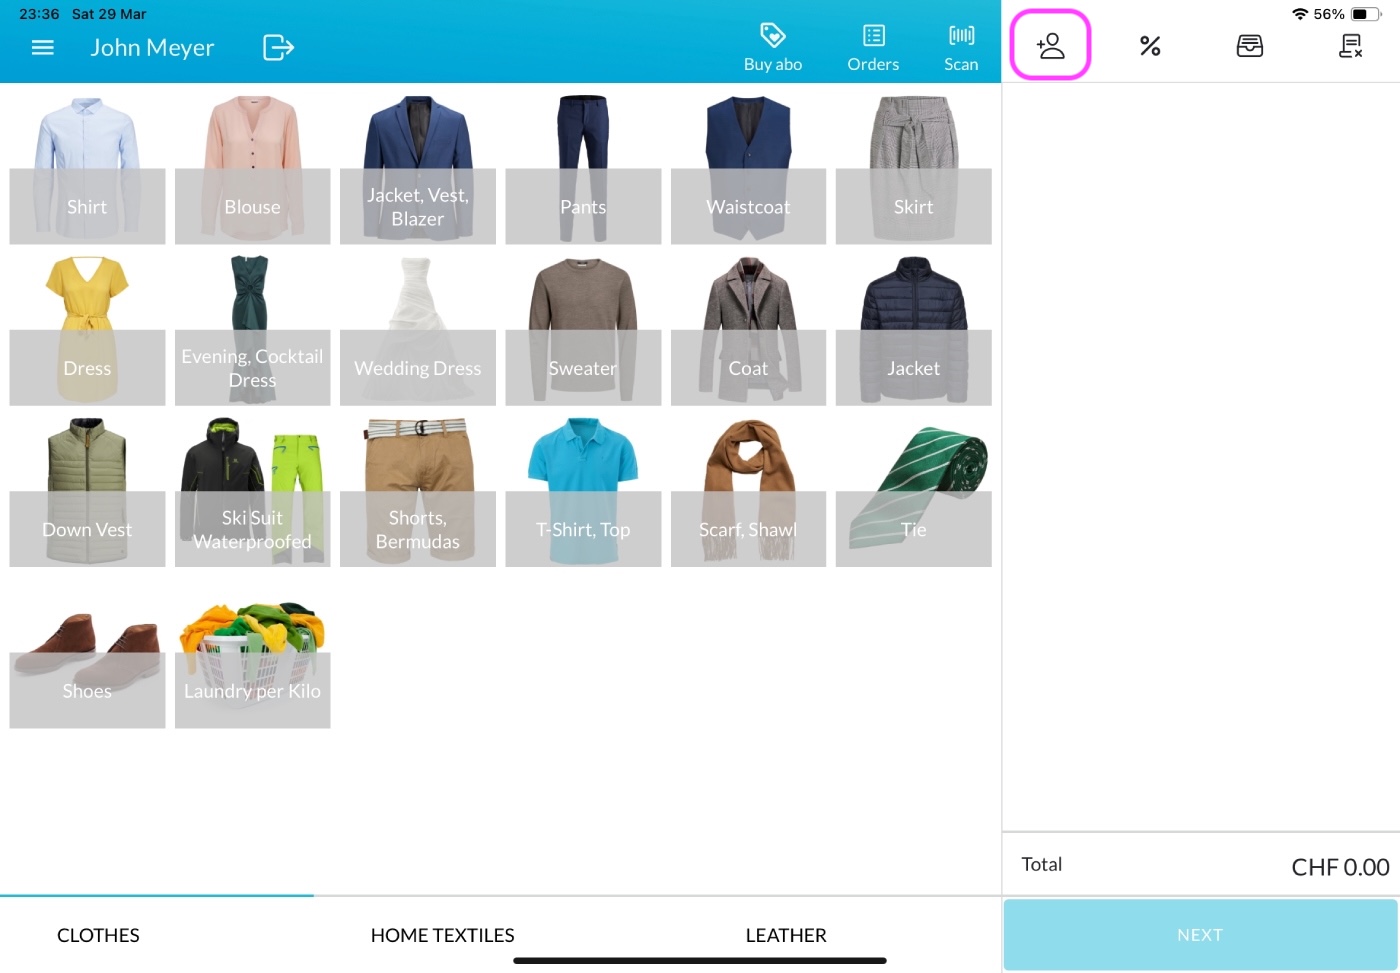
1. Select the Customer Icon
On the main Sales page, click the Customer Icon to open Customer Overview page.
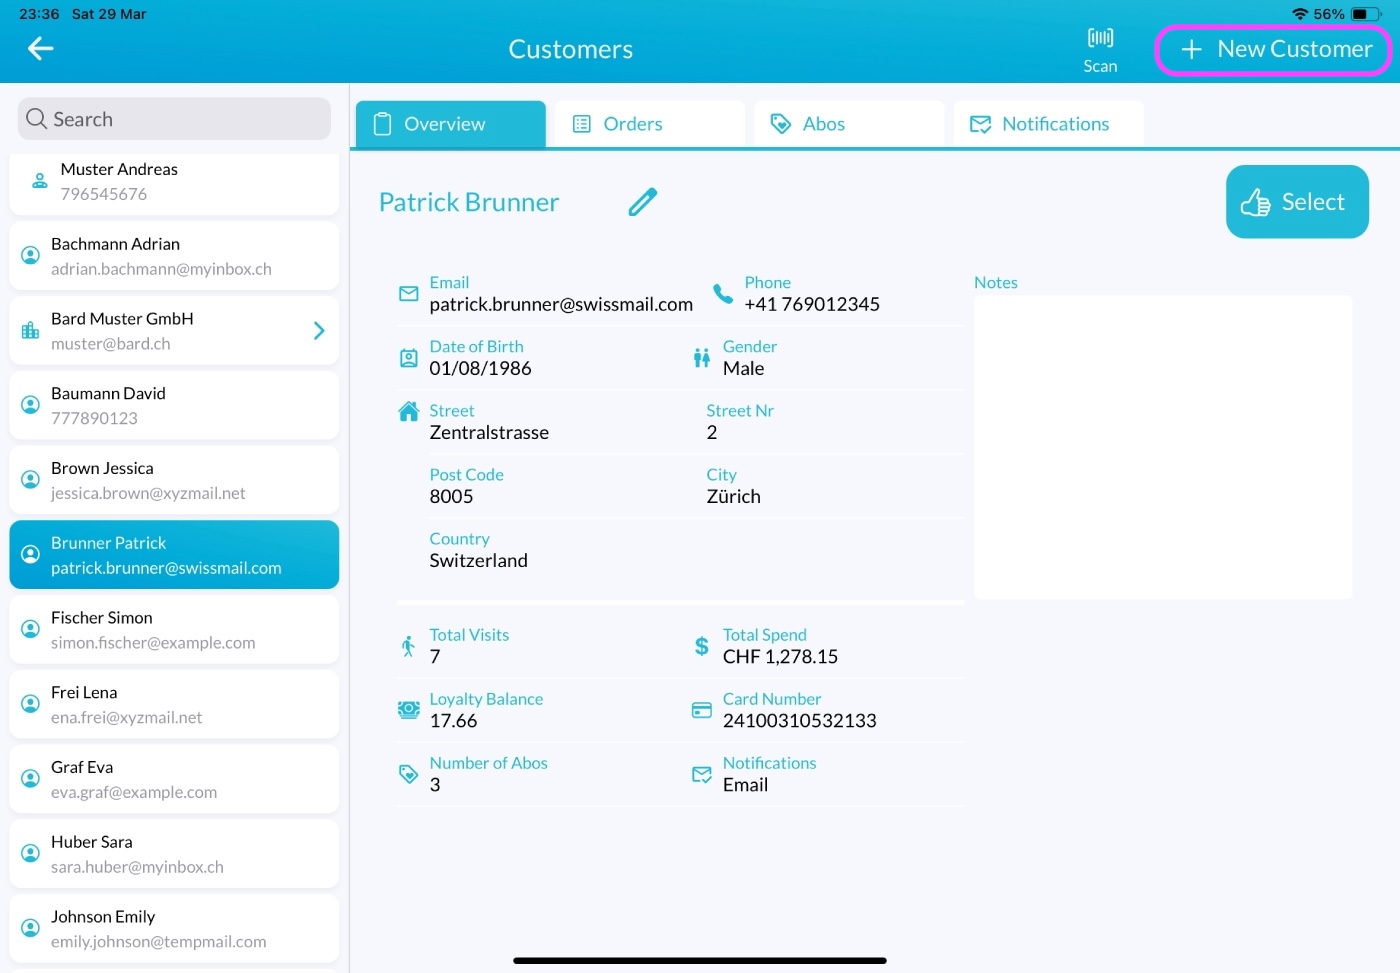
2. Click on “+ New Customer”
On the Customer Overview page, click “+ New Customer” to start the registration process.
3. Fill in the Customer Details
A New Customer Registration Form will appear.
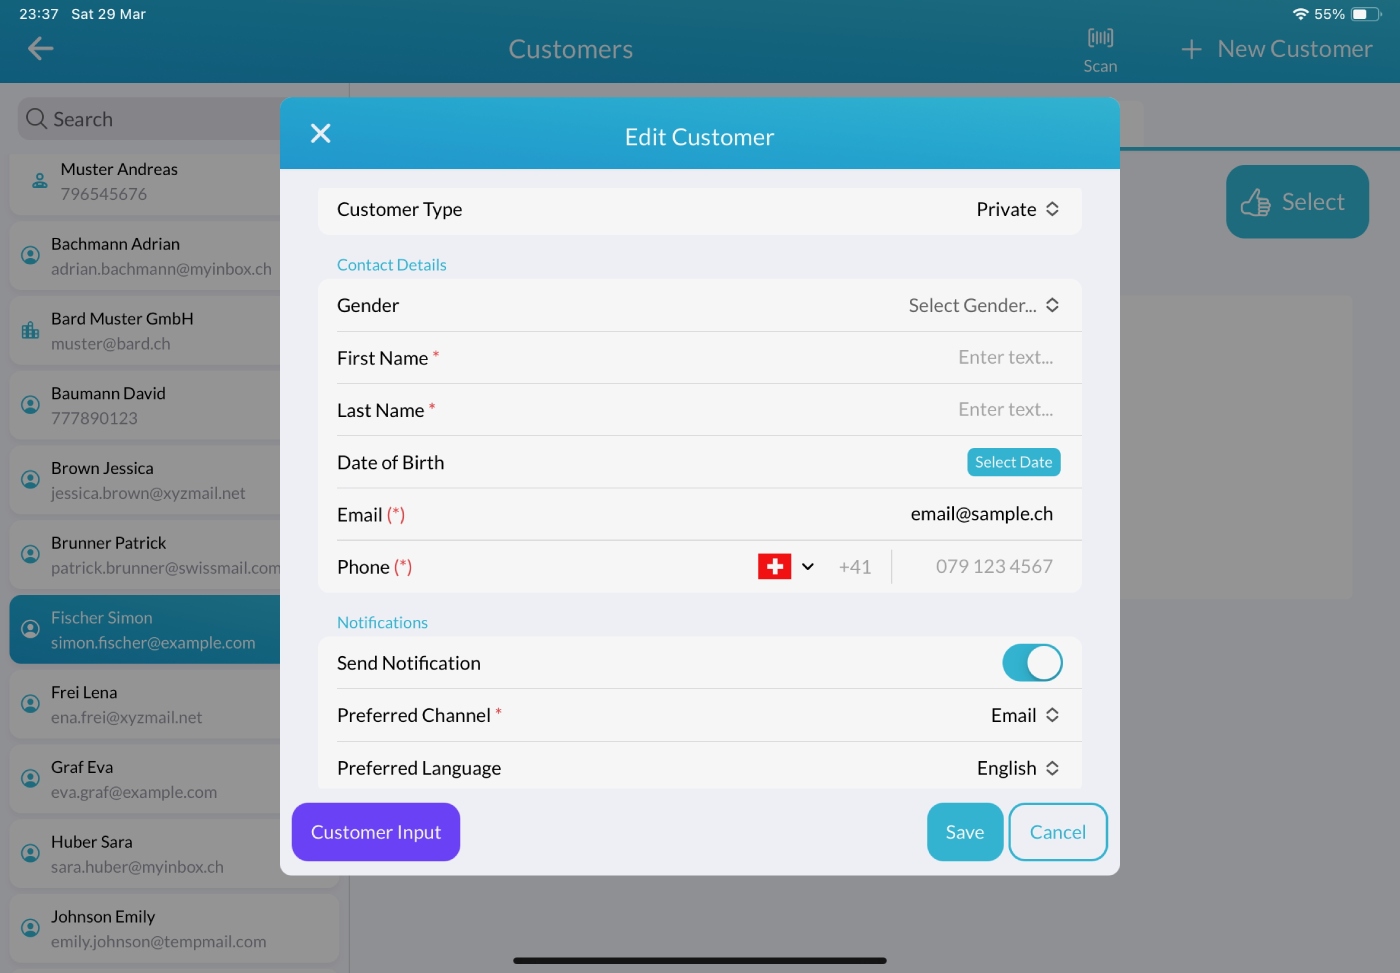
You can now enter the customer’s data in the fields provided.
Customer Type: There are four main customer types to choose from:
- Private (default): Regular private customers.
- Business: Business customers. You can assign a special business discount and issue invoices in the back office.
- Enterprise: Designed for businesses customers with multiple employees. This option is useful if you work with companies that have many members and want to manage all employees under one account. If there’s an agreement in place, you can also apply an enterprise discount.
- Enterprise Member: Use this type to add individual employees under an Enterprise customer.
Contact Details: Enter the customer’s First Name, Last Name, Gender, Date of Birth, Email, Phone Number, and Address.
- Phone Number or Email is required—at least one must be provided.
- Gender (optional): Choose from Male, Female, or Not Specified.
- Date of Birth (optional): Enter the customer’s birth date if needed.
- Address (optional): You may enter the customer’s address if applicable.
Additional Settings:
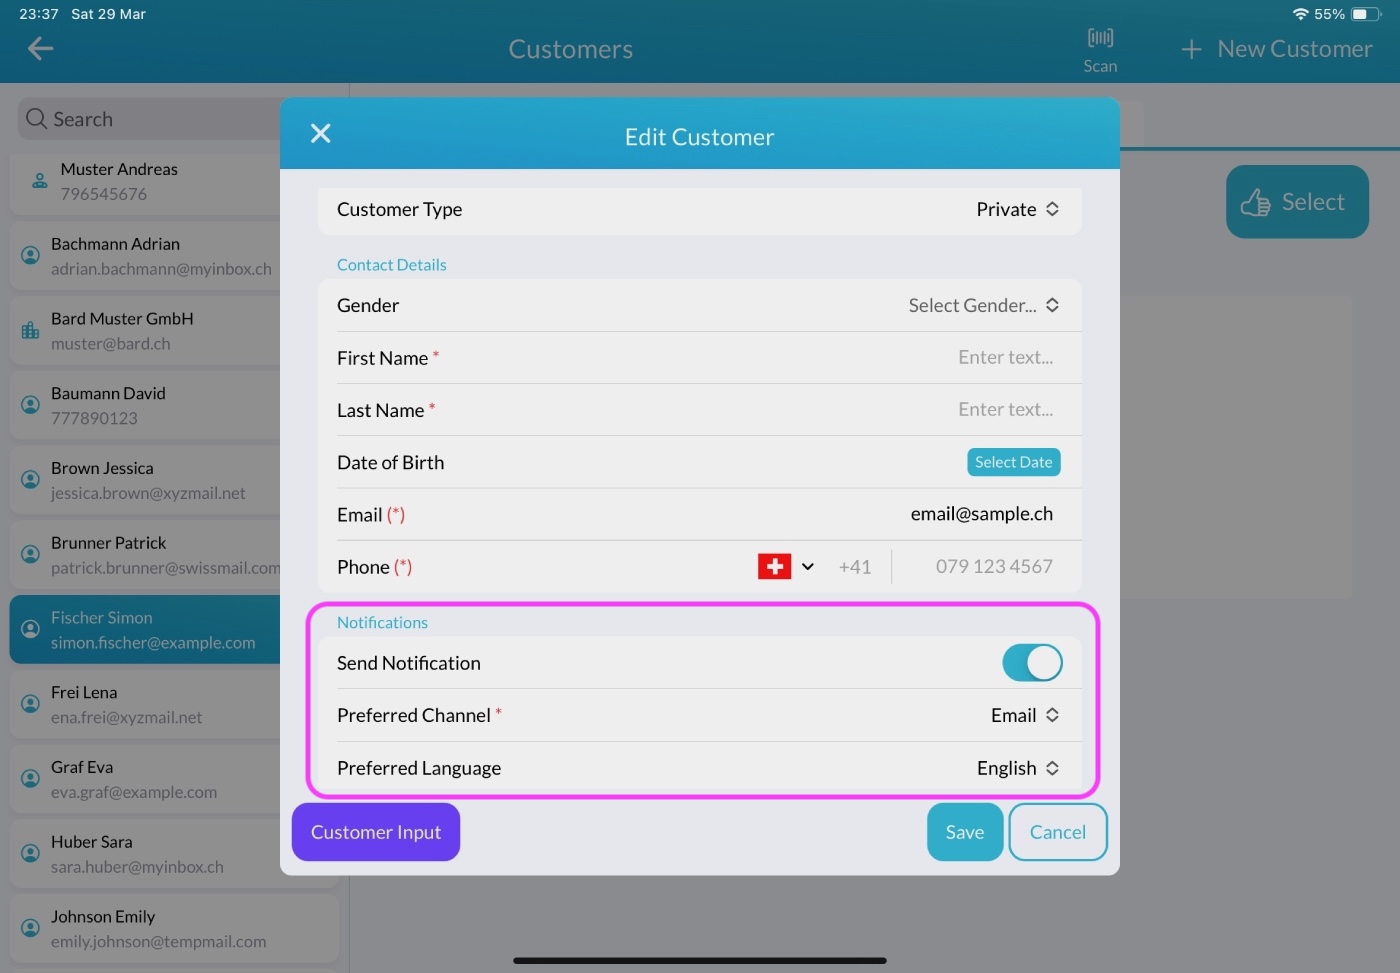
Send Notifications:
Turn this option on if you want to notify the customer when their order is ready for pickup. You can also choose the customer’s Preferred Channel of Notification (e.g., email) and Preferred Language for receiving notifications.
Customer Discount:
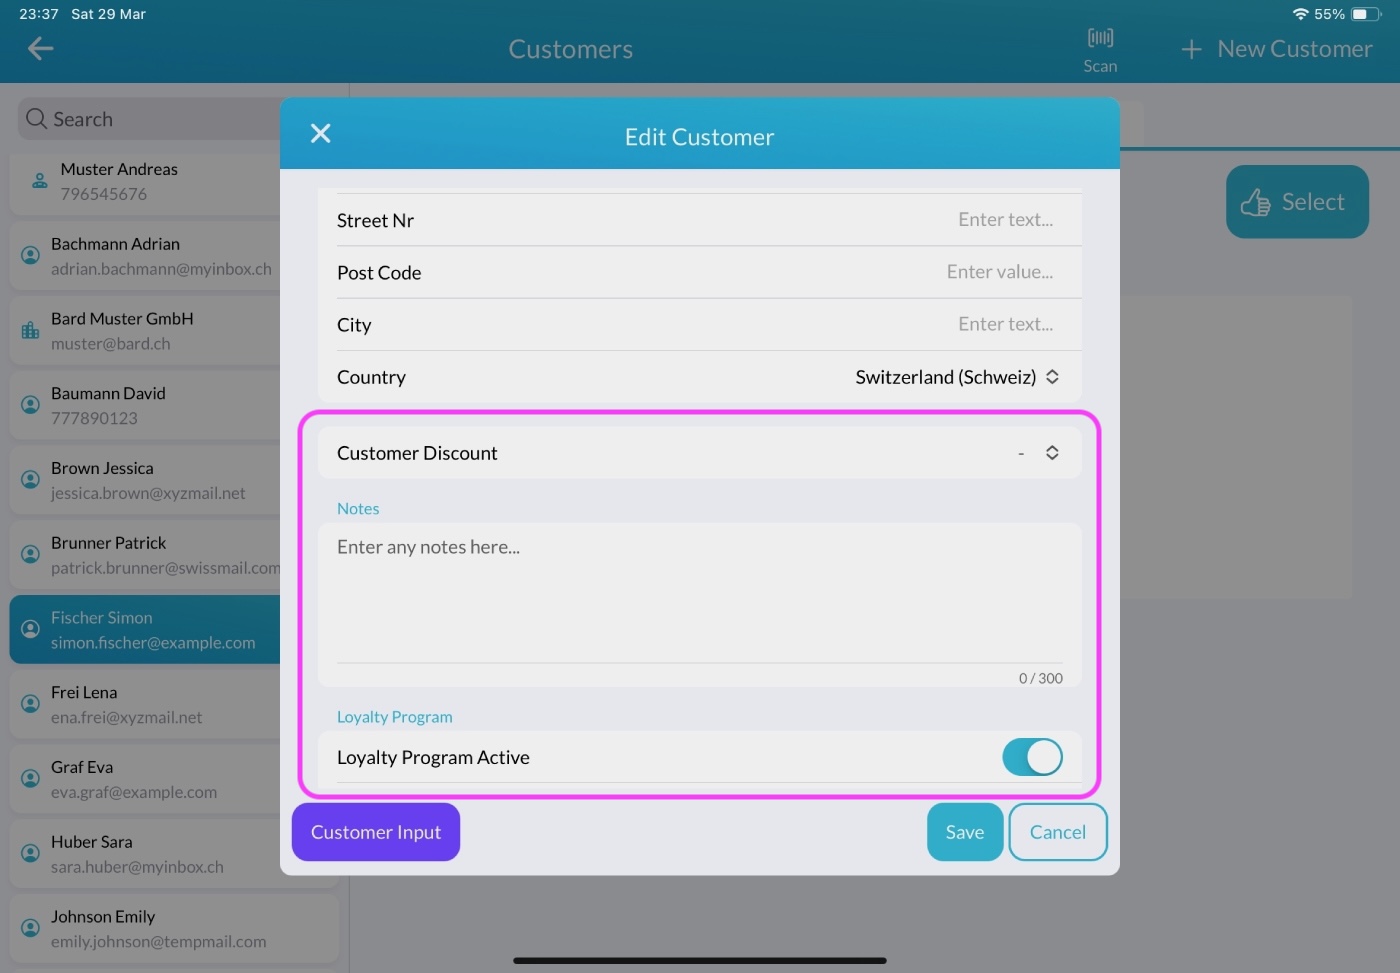
Assign a Custom Discount to specific customers, mainly used for business clients. Once assigned, this discount will automatically apply to every order for that customer.
Notes:
You can add custom notes about the customer, such as preferences or other details. These can be edited later on the Customer Overview Page.
Loyalty Program:
If the Loyalty Program is activated in the Back Office, customers will collect points for every order they place. To deactivate the loyalty program for a specific customer, simply toggle off the option.
4. Final Steps: Save the Customer
Once all customer details are filled in, click Save to complete the process and return to the Customer Overview Page.
Customer Self-Input Option
Alternatively, you can let the customer fill in their details.
Click on “Customer Input” to display the customer registration form on the Customer Display. The customer can fill in their contact details and address on the display.

When the customer is finished, they will press “Confirm” on the customer display. The data will be transferred to your main POS display.
You can review the information, adjust the additional settings described above, and press “Save” to finalize the process.

