Making a sale in Lagutta POS is a seamless process designed for efficiency and flexibility. Whether linking a customer to the order, selecting items, setting a pickup date, or processing payments, every step ensures an optimized experience for both employees and customers.
Step-by-Step Guide to Creating a New Order
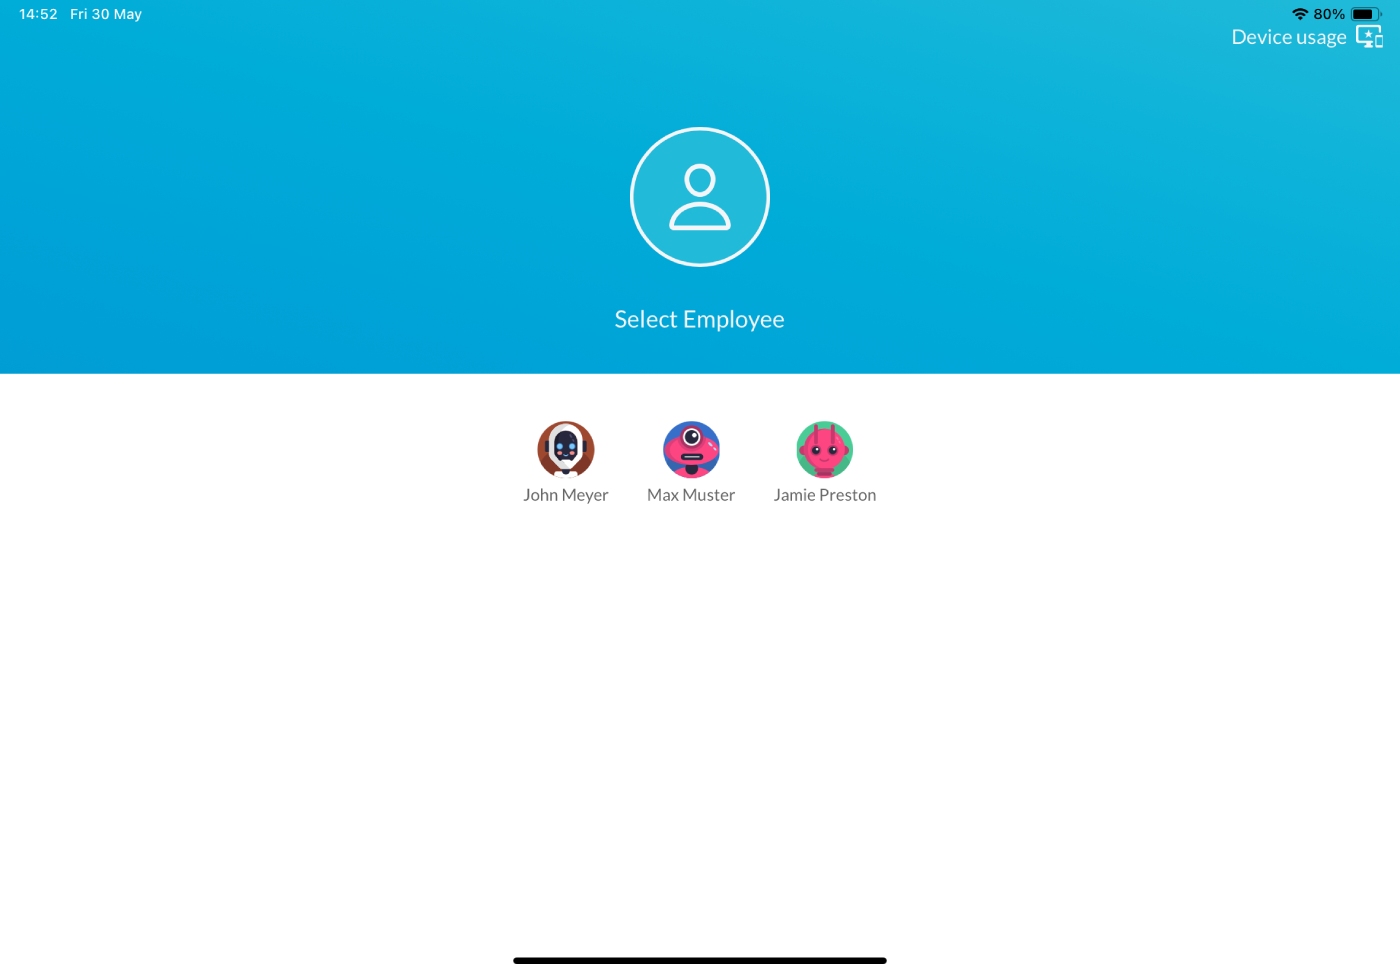
1. Sign in and Navigate to Sales Page
Start by launching the Lagutta POS app. After signing in with your employee PIN, you are automatically directed to the Sales Page. If you’re on another page, tap the Menu icon and select Sales Page.
2. Add a Customer to the Order (Optional)
You can create orders with or without linking a customer. Learn How to Add a Customer to an Order
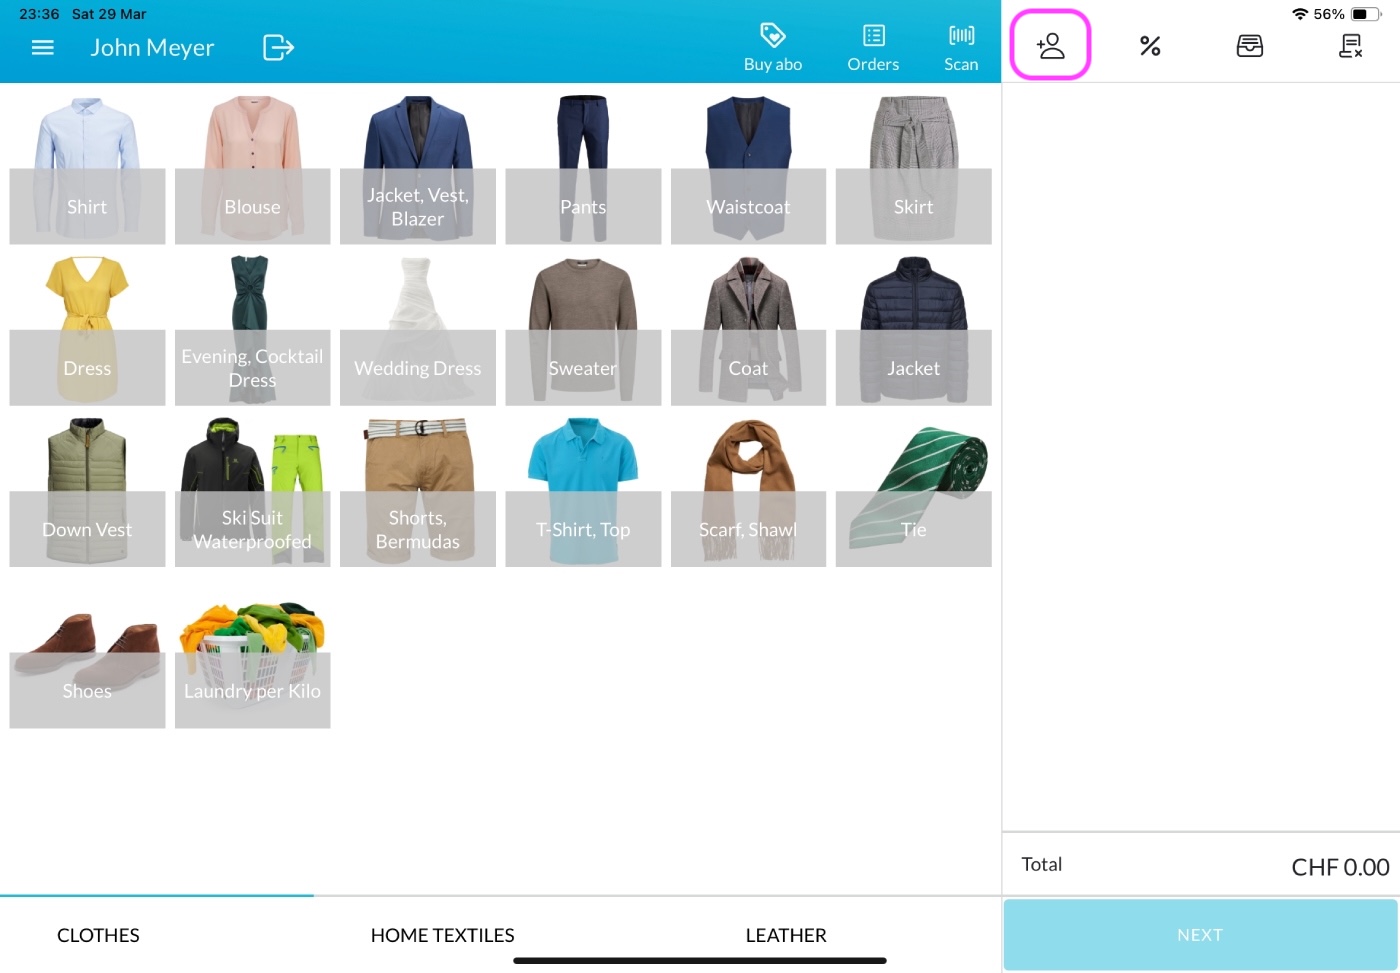
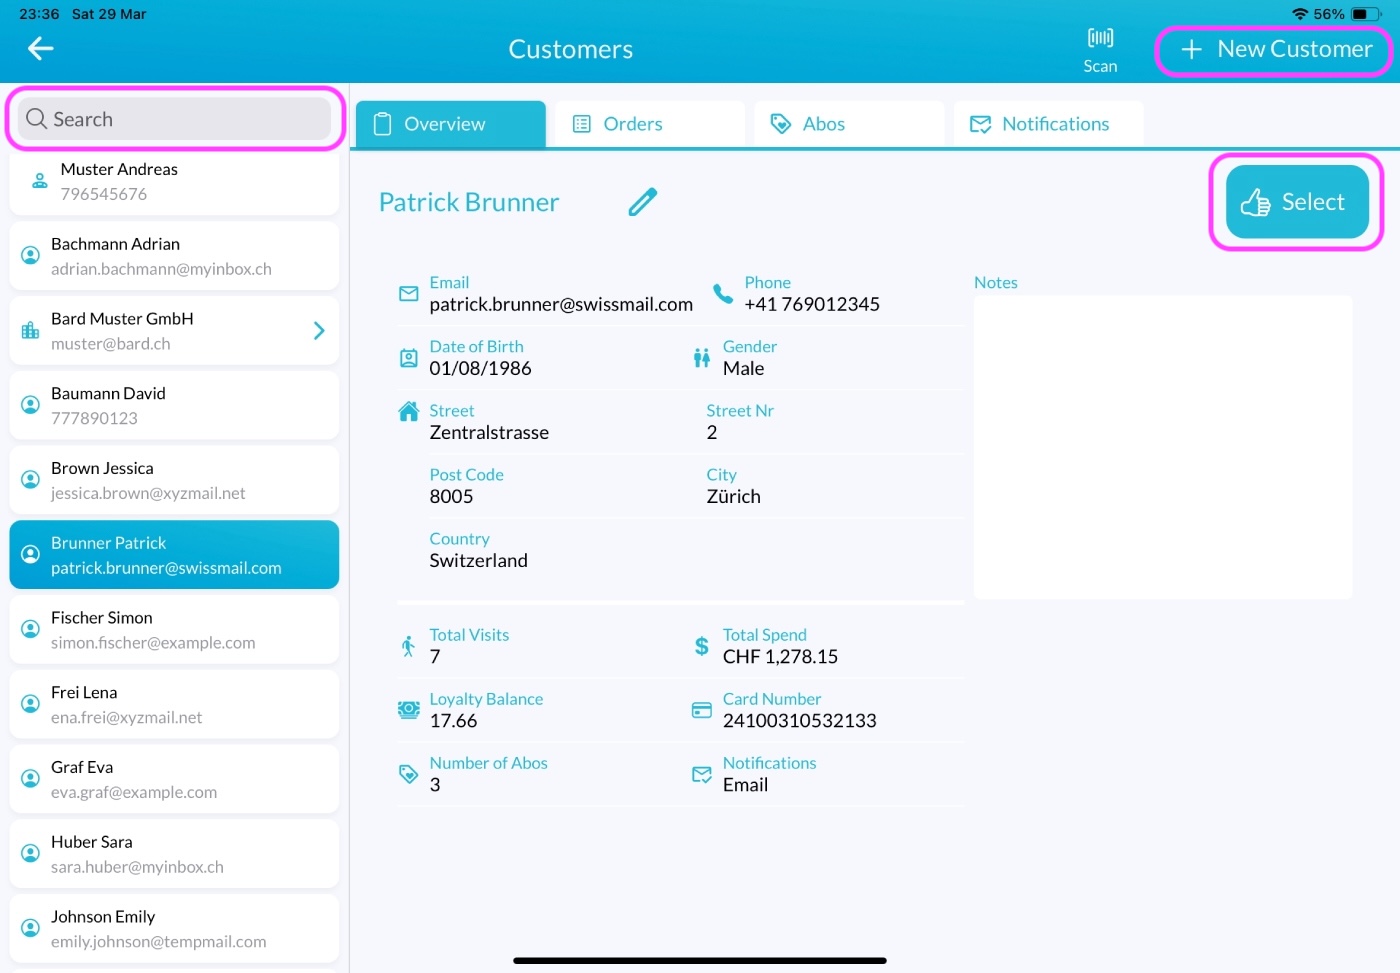
To add a customer, tap the Customer icon on the Sales Page.
Choose an existing customer or Register New Customer. Learn How to Register a New Customer
Note: Adding a customer allows you to:
- Send order notifications
- Reward loyalty points (if activated)
- Track order history per customer
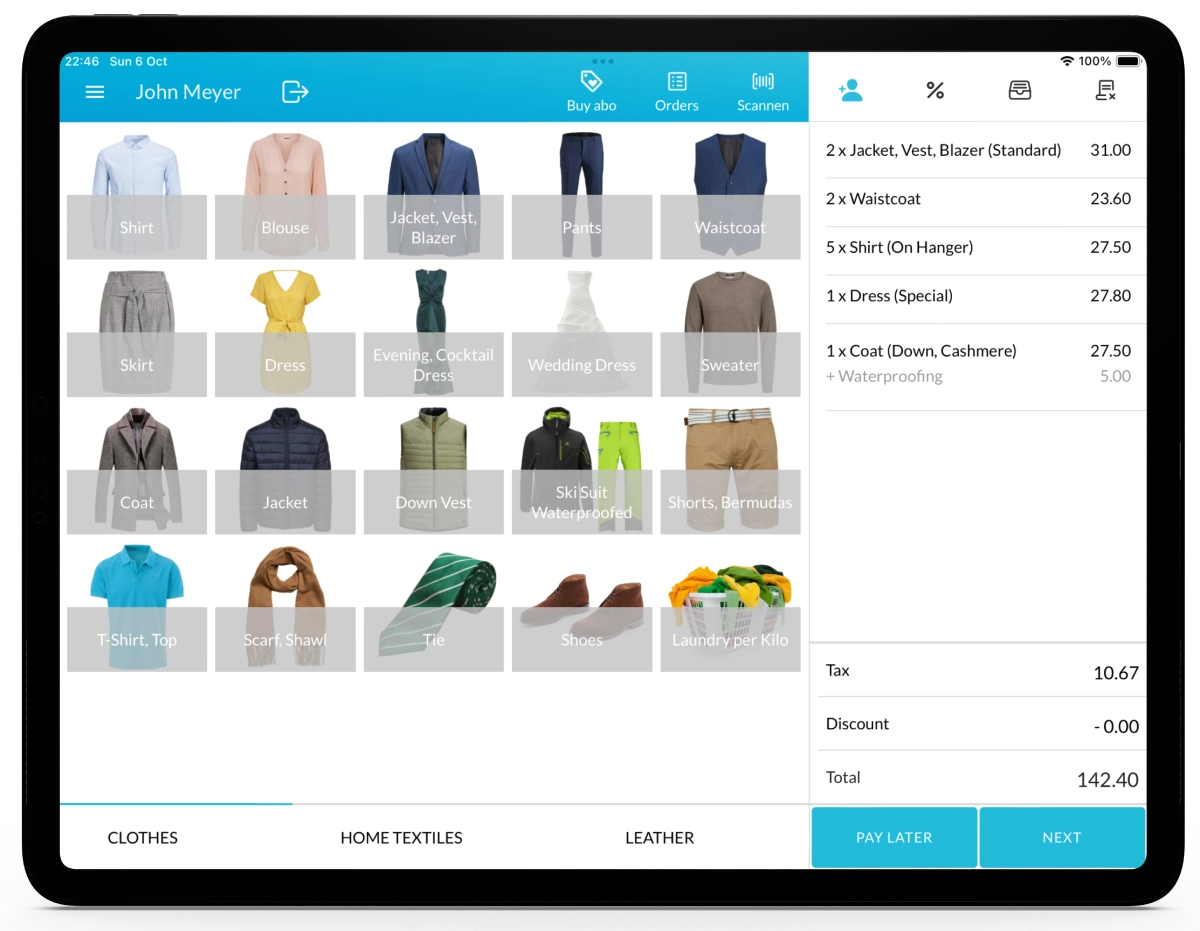
3. Add Items or Services to the Cart
On the Sales Page, you’ll see items organized by categories. Use the bottom bar to navigate between categories. Learn how to Add Categories
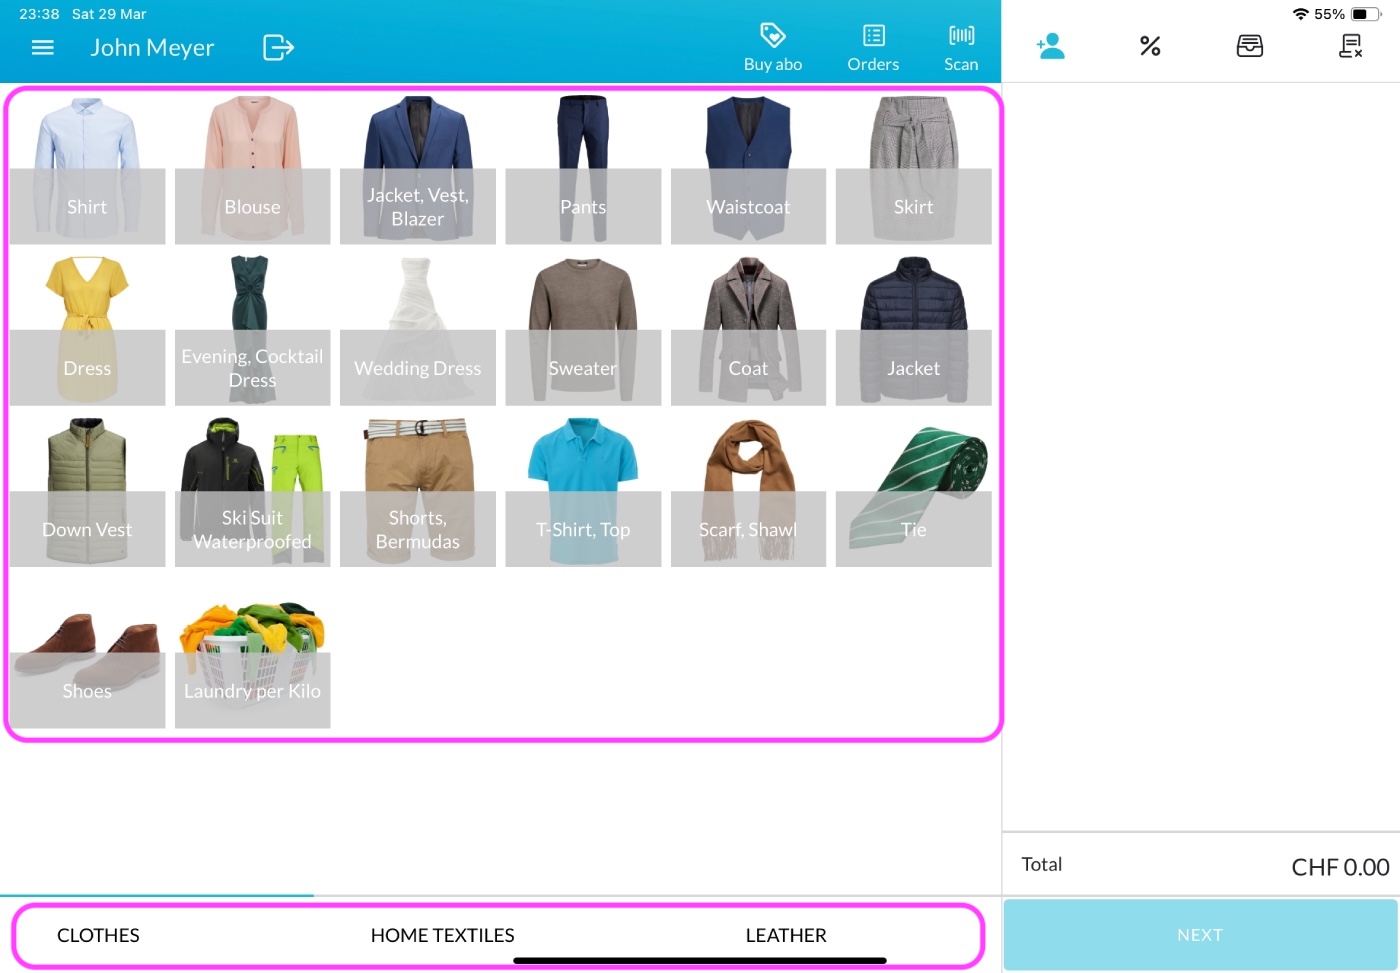
Click on the desired Item/Service to open the Item Details. Learn how to Add and Configure Items or Services
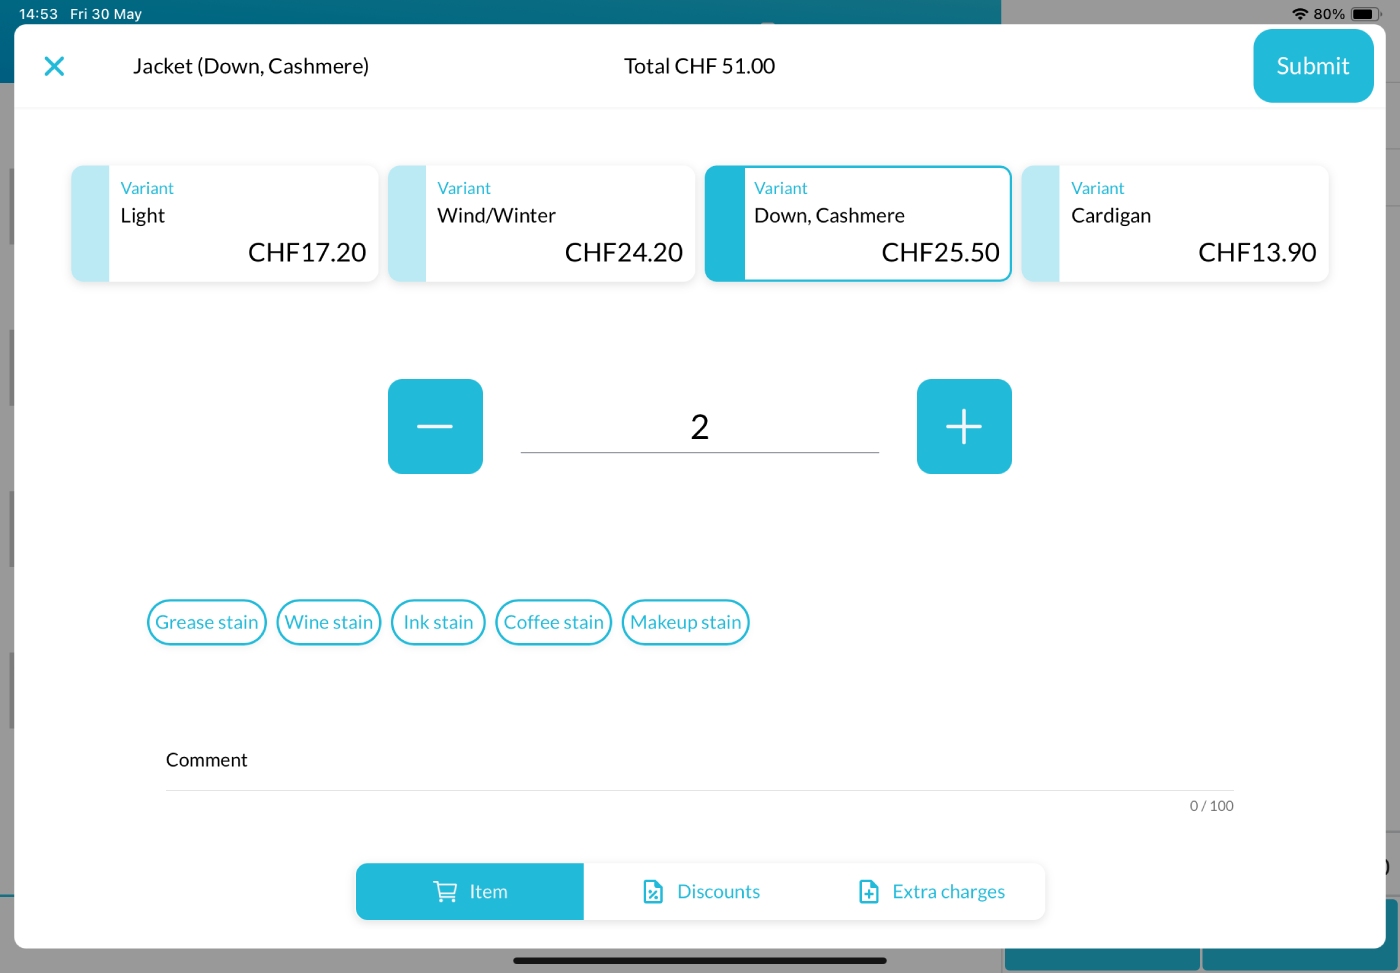
In the Item Details window, you can select:
- Item Variant: If the item has multiple variants, select the appropriate one.
- Item Quantity: Use the plus and minus buttons to set the quantity.
- Item Tags: Select any applicable tags (multiple tags can be chosen; selected tags will be highlighted and printed on Item labels). Learn How to Add Tags
- Comments: Add any relevant comments for the item.
- Discounts: Navigate to the Discount Tab to apply any assigned discounts. If a discount is set to apply automatically, it will be added once criteria are met. Learn How to Add an Item Discount
- Extra Charges: Navigate to the Extra Charge Tab to apply any additional charges. Multiple extra charges can be selected and will be highlighted. Learn How to Add Extra Charges
Once configured, click the Submit button to add the item to the cart on the right side of the Sales Page. Repeat this step to add as many items as needed.
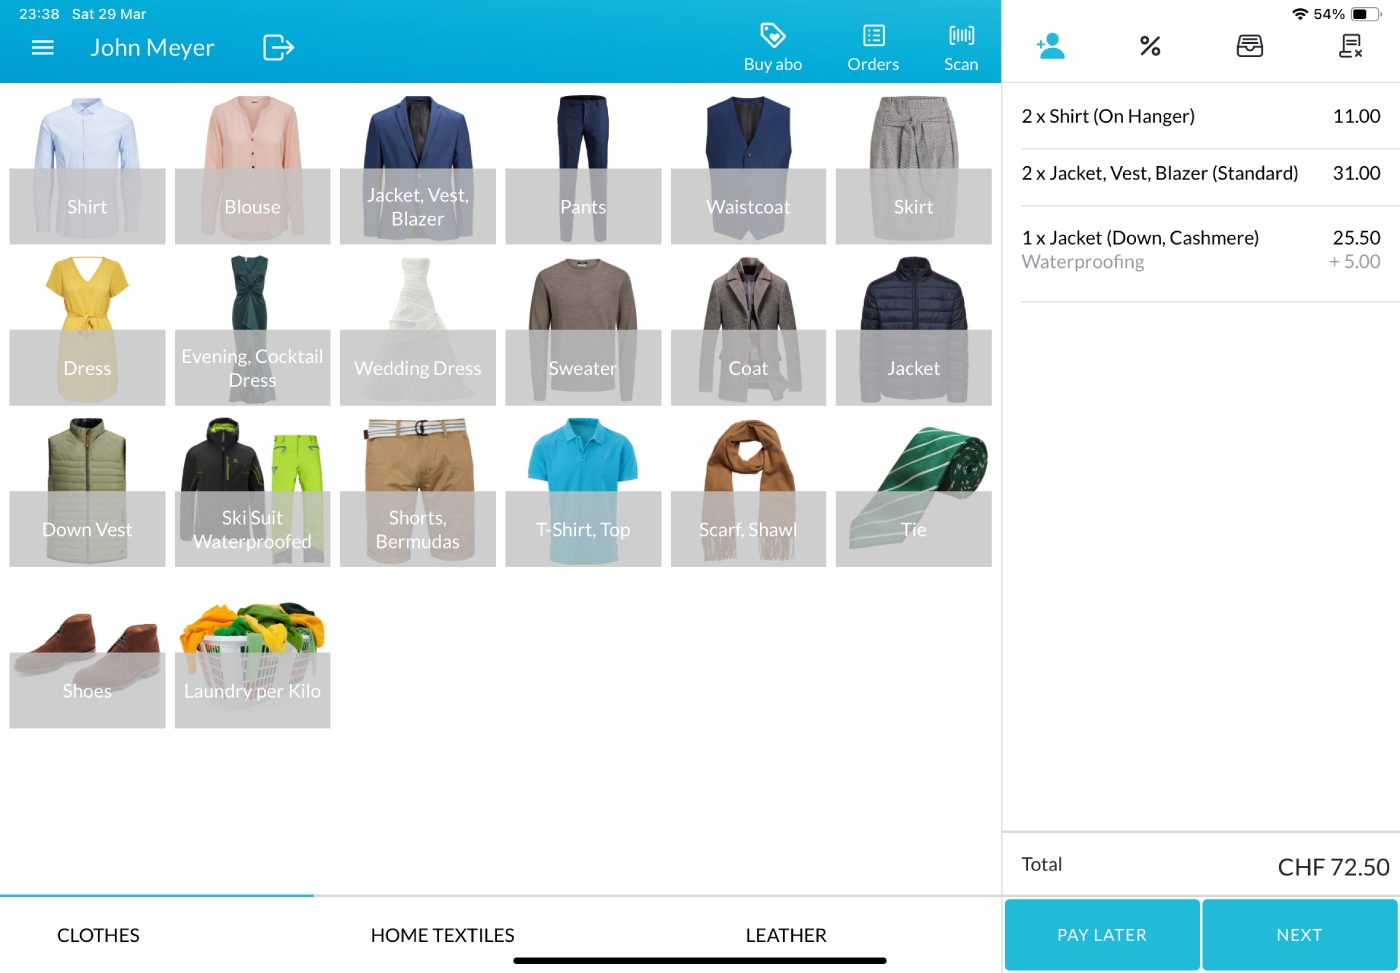
4. Select Pickup Date
When you’ve added all items, click the Next button to open the Pickup Date Selection window. If this feature is disabled in the settings, you’ll proceed directly to the Payment Page. Learn How to Enable and Configure Pickup Date Selection Window
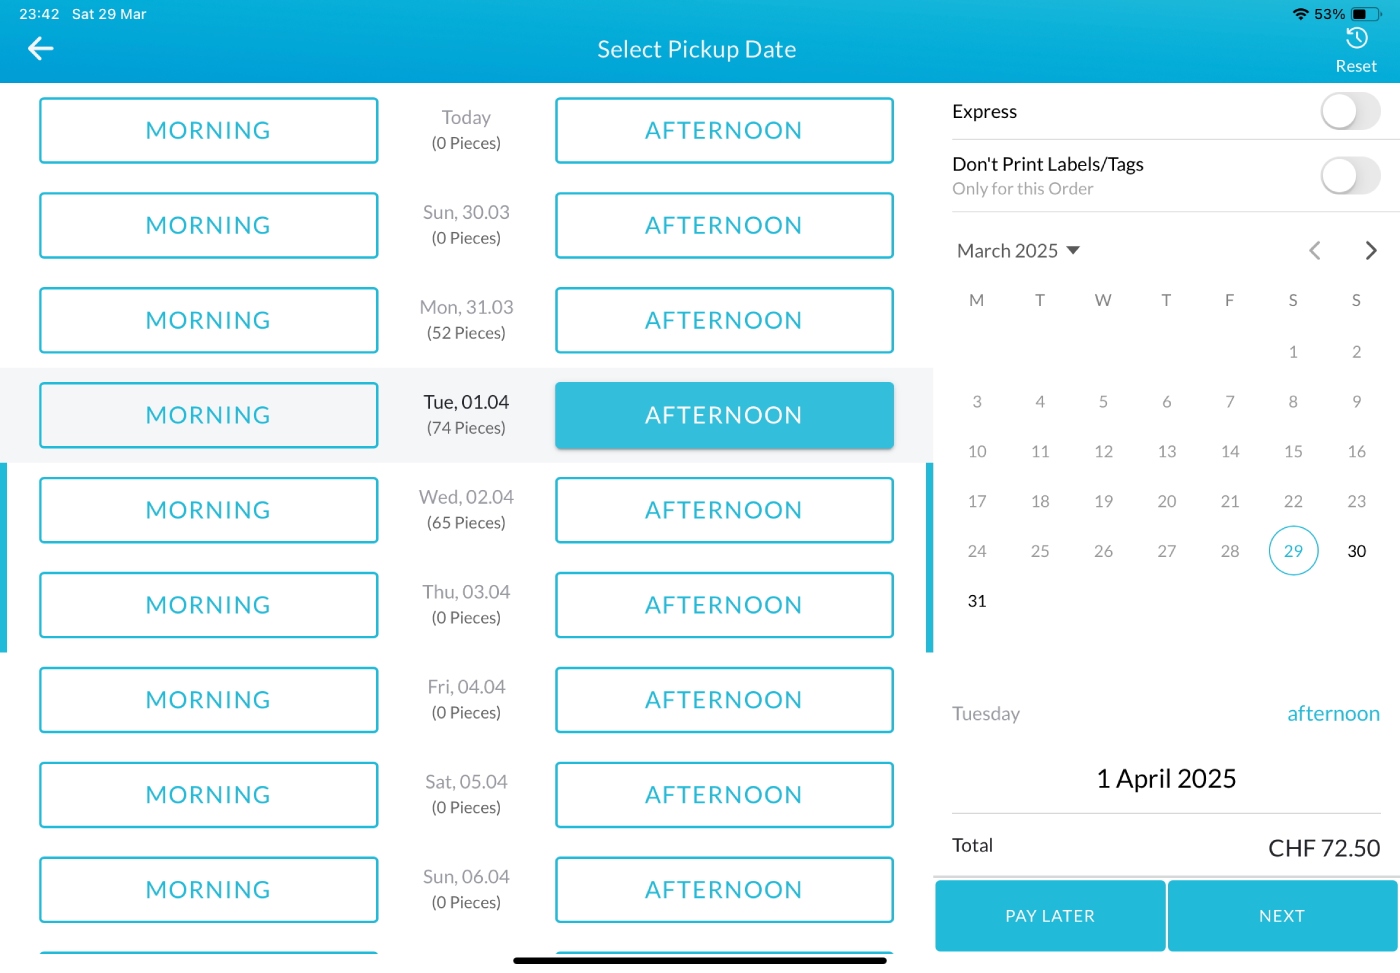
In the Pickup Date Selection window:
- Choose the date when the order will be ready and select Morning or Afternoon. This information will appear on the customer receipt, order confirmation and Item labels.
- Toggle the Express button (top-right) if the order is urgent, and an express note will be printed on the order confirmation.
5. Choose Payment Option or Pay Later
If the customer prefers to pay later (e.g., at pickup), click the Pay Later button on the Pickup Date window or the Sales Page. The order will be finalized, and the receipt, order confirmation, and item tags/labels will be printed.
To process payment now:
- Click the Next button to navigate to the Payment Page.
- Select a payment method from the options configured in the Back Office. Learn How to Add and Manage Payment Methods

Cash Payment
- Choose the Cash payment method.
- The screen displays three boxes: Total Due, Received Amount, and Change.
- Below these, the system suggests four possible amounts the customer might pay based on the total due.
- If the customer provides a different amount, enter it using the number pad. The Received Amount and Change fields will update automatically.
Card Payment
- For standalone payment terminals, select Card Payment and manually enter the amount into your external terminal.
- For SumUp payments, select SumUp as the payment method. The POS will transfer the due amount to the SumUp terminal and wait for the customer to complete the payment. Once paid, the receipt will include payment details (e.g., card type, transaction ID).
Invoice
- If the customer wants to pay by invoice, select Invoice as the payment method.
- The invoice can later be generated and sent to the customer from the Back Office using the Invoice Management
5. Order Completion
After successful payment or Pay Later selection a Success Screen will appear, signaling order completion. The system is now ready for the next Order.