With Lagutta POS, you can grant employees access to the POS or Back Office using their email. Assign a role with the necessary permissions, send an invitation, and allow them to set up a password for secure login.
Step-by-Step Guide to Granting Employees Access to POS or Back Office via Email
1. Log in to Lagutta Back Office
To begin, log in to the Lagutta Back Office. Learn How to Access Lagutta Back Office
2. Navigate to the Employee Directory
In the left-hand navigation menu, go to the Employees section and select Employee Directory.
Here, you will find a list of all existing employees.
Here, you will find a list of all existing employees.
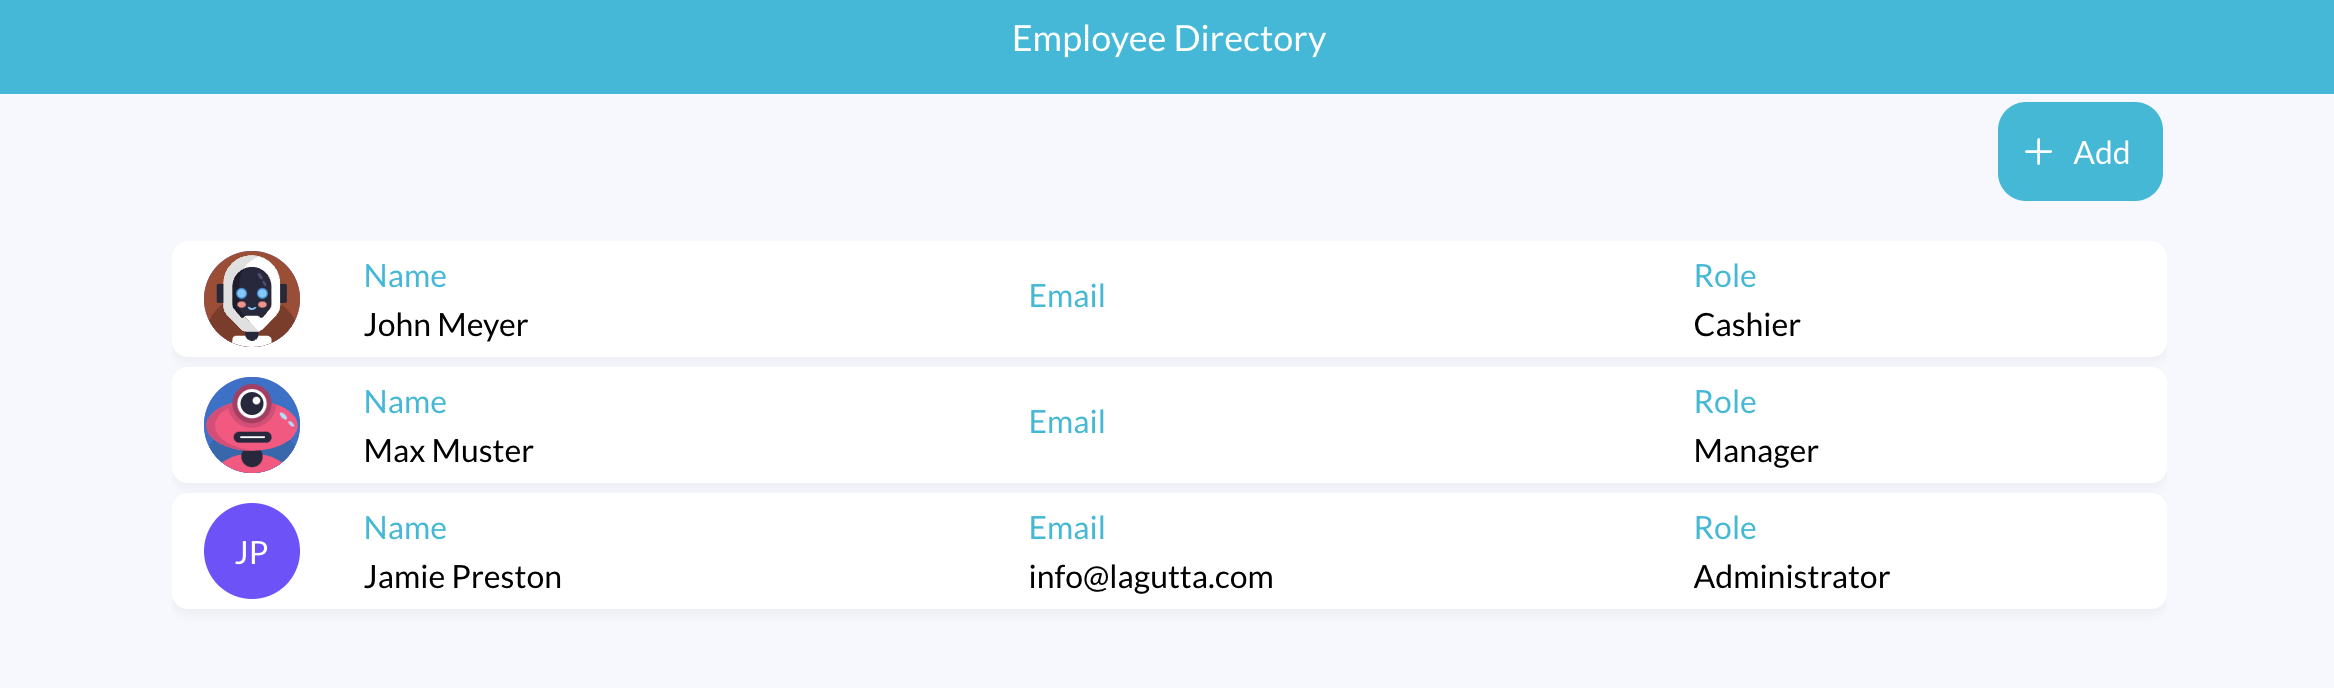
You can either select an existing employee to grant access or create a new employee. Learn How to Add a New Employee
3. Assign a Role with Login Permissions
The Edit or New Employee window will open.
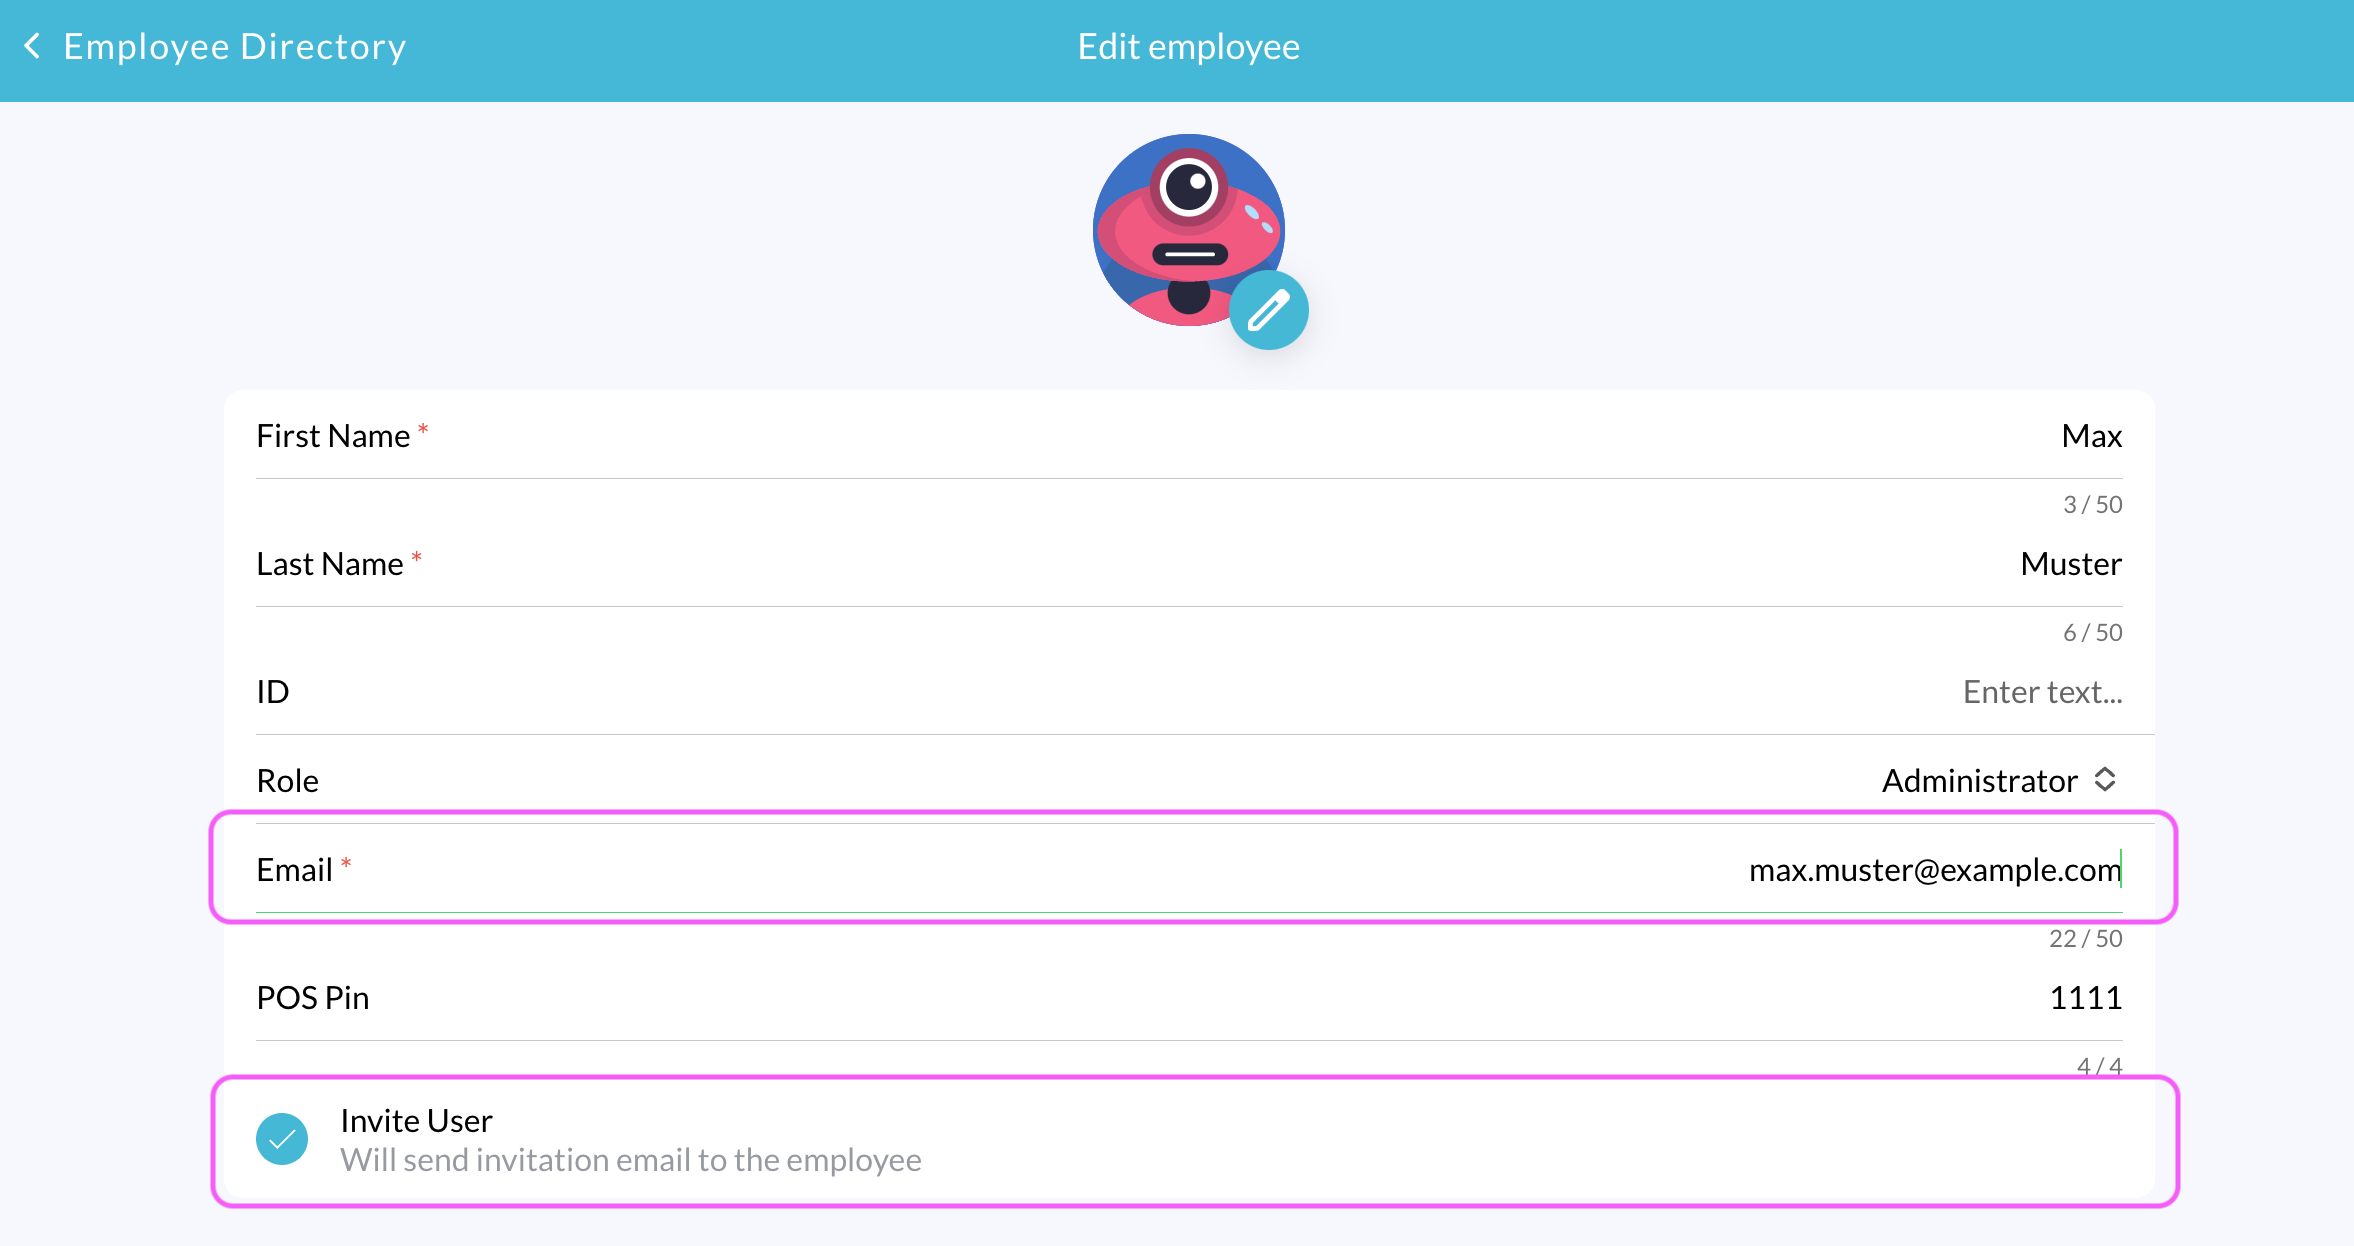
- In the Role field, select a role that includes Manage POS (to allow login via email to the POS) or Manage Back Office (to allow login to the Back Office).
- By default, the Administrator role has all permissions, including access to the Back Office and POS. The Manager role allows login to the POS but does not grant access to the Back Office.
- You can also create a custom role that meets your specific needs. Learn How to Manage Employee Roles & Permissions
- When a role with login permissions is selected, the Email field becomes mandatory, and the Invite User checkbox appears.
4. Send an Invitation Email
- Make sure that the Invite User box is selected.
- Click Save to send the invitation email.
5. Employee Confirms the Invitation and Sets Up a Password
- The employee will receive an invitation email.
- They must click on the confirmation link provided in the email.
- A setup window will open where they can create their password.
- Once the password is set, the employee will have access to the POS or Back Office based on their assigned role.