In Lagutta POS, extra charges like waterproofing, express service, or special packaging can be easily applied to specific items or services during the sales process.
Step-by-Step Guide to Applying Extra Charges in Lagutta POS
1. Navigate to the Sales Page in Lagutta POS
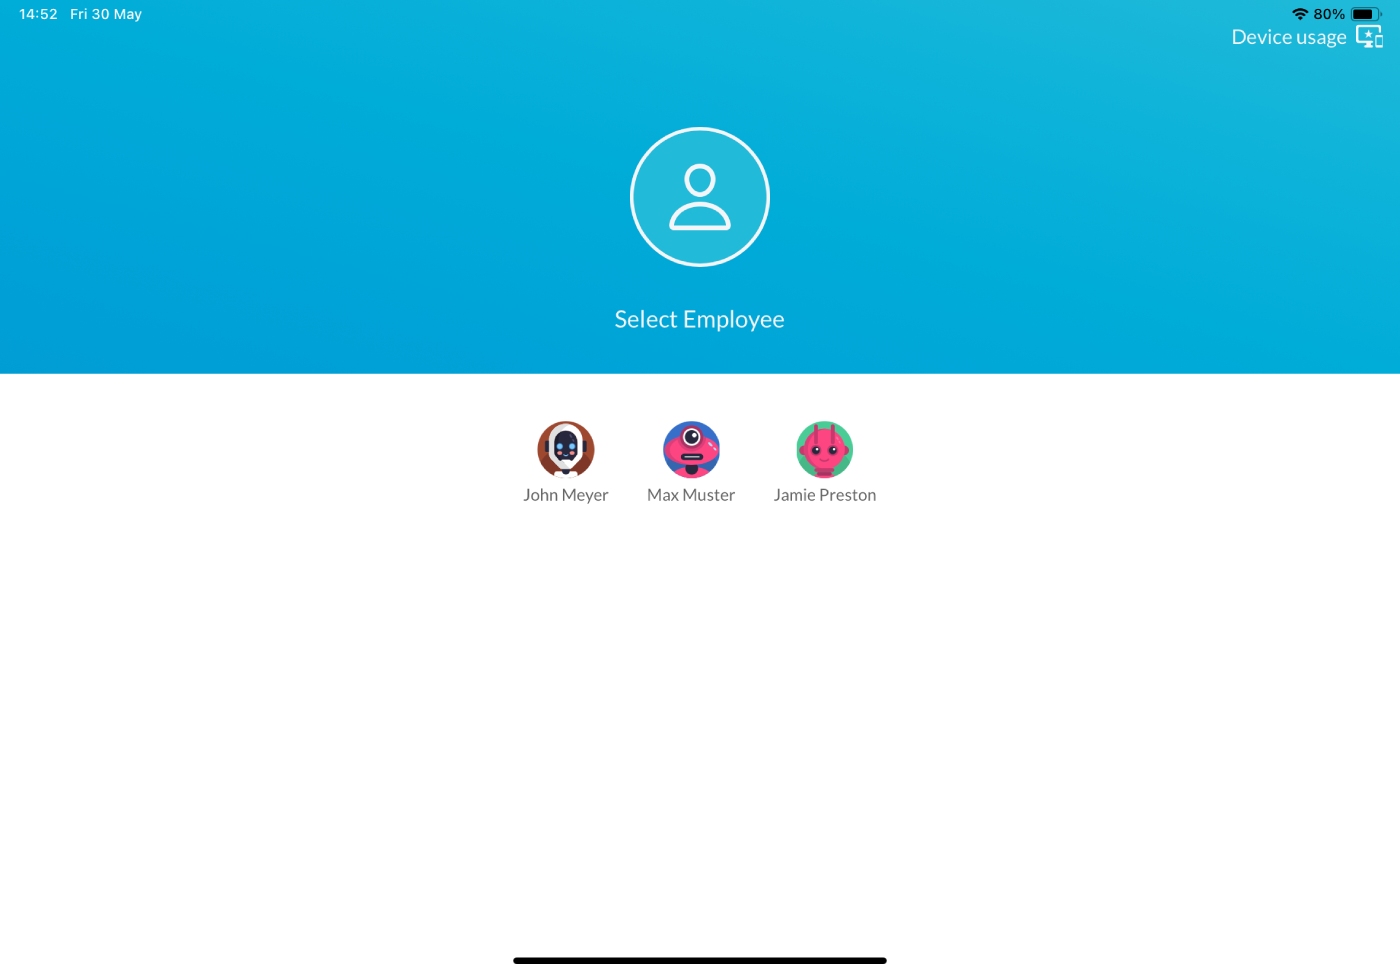
Open the Lagutta POS app and sign in with your employee PIN to access the Sales Page. If you’re on another page, tap the Menu icon and select Sales Page.
Note: This guide assumes you’re familiar with creating orders. For detailed navigation instructions, refer to our How to Create a New Order guide.
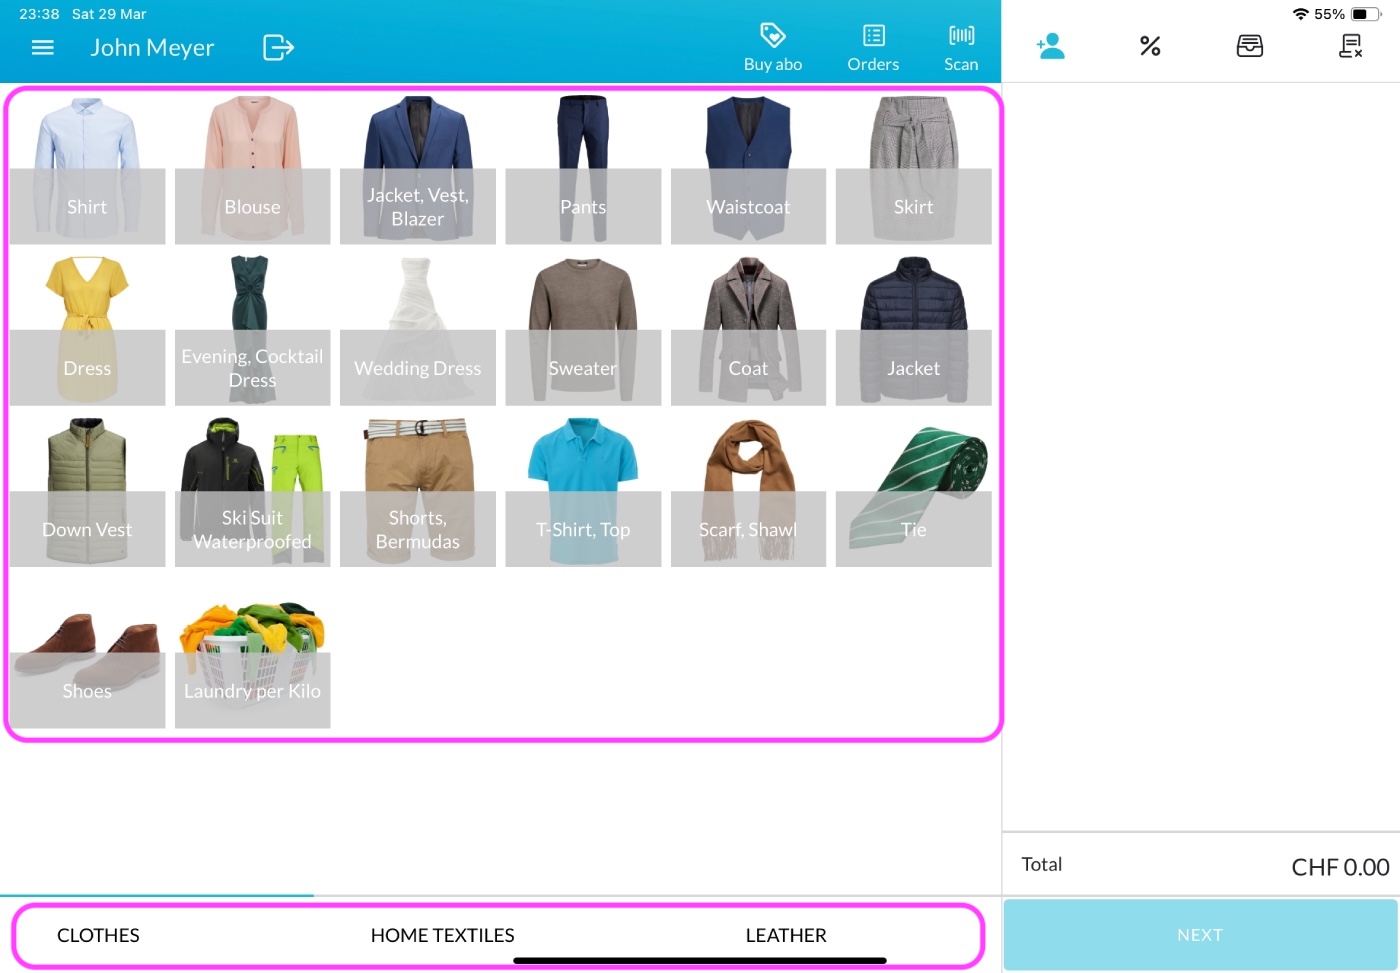
2. Select an Item or Service
On the Sales Page click on the desired Item or Service to open the Item Details window. Learn How to Add and Configure Items or Services
3. Apply Extra Charges to the Item or Service
In the Item Details window, navigate to the Extra Charges tab located at the bottom center of the screen.
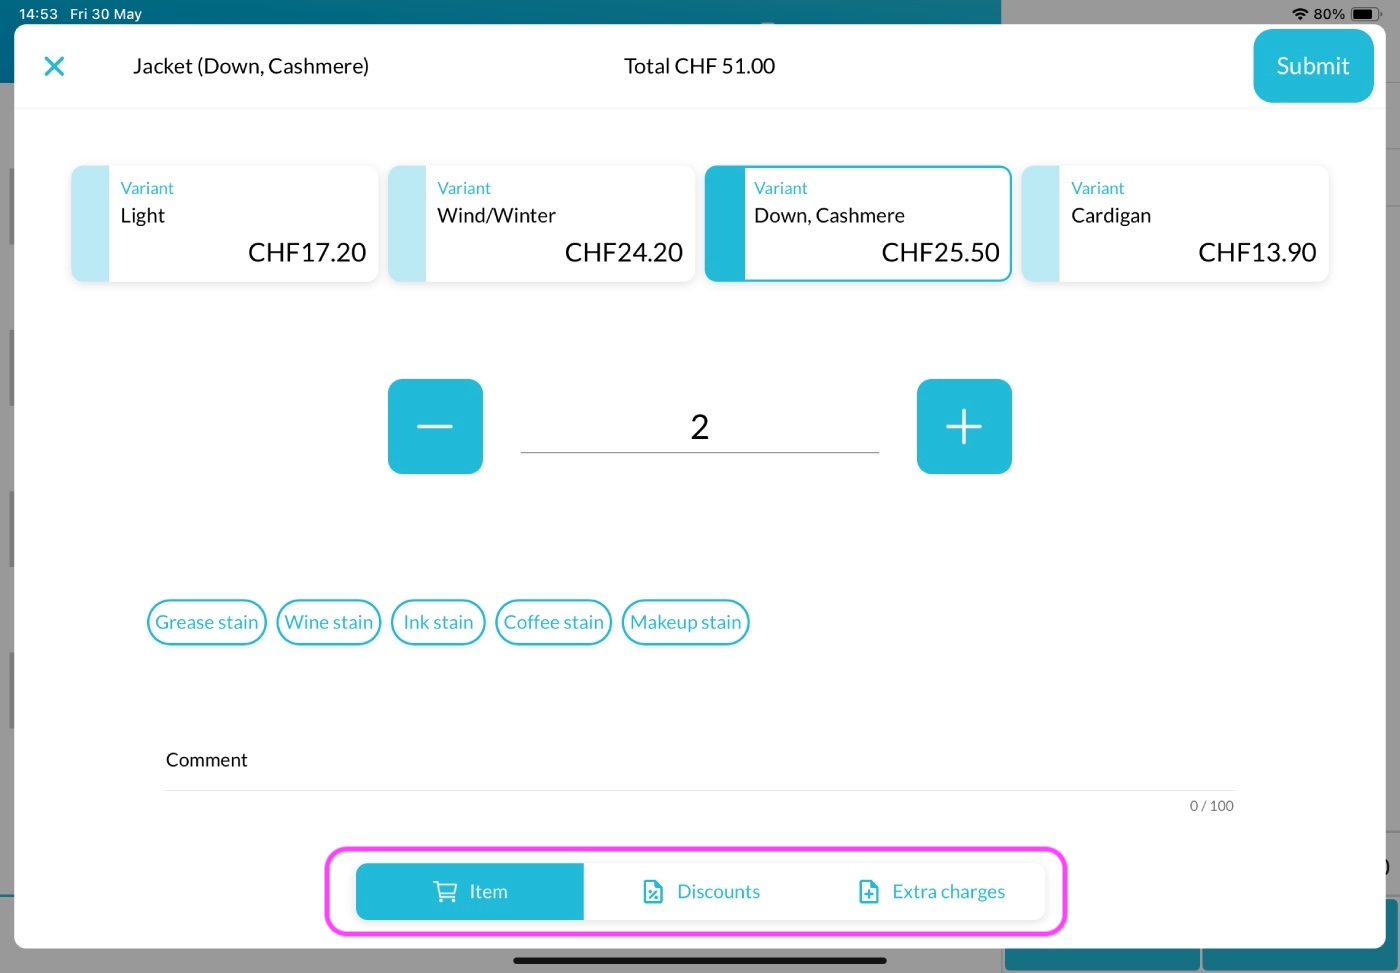
Here you’ll see all extra charges that are assigned to the selected item or service. Learn how to Add Extra Charges in the Back Office
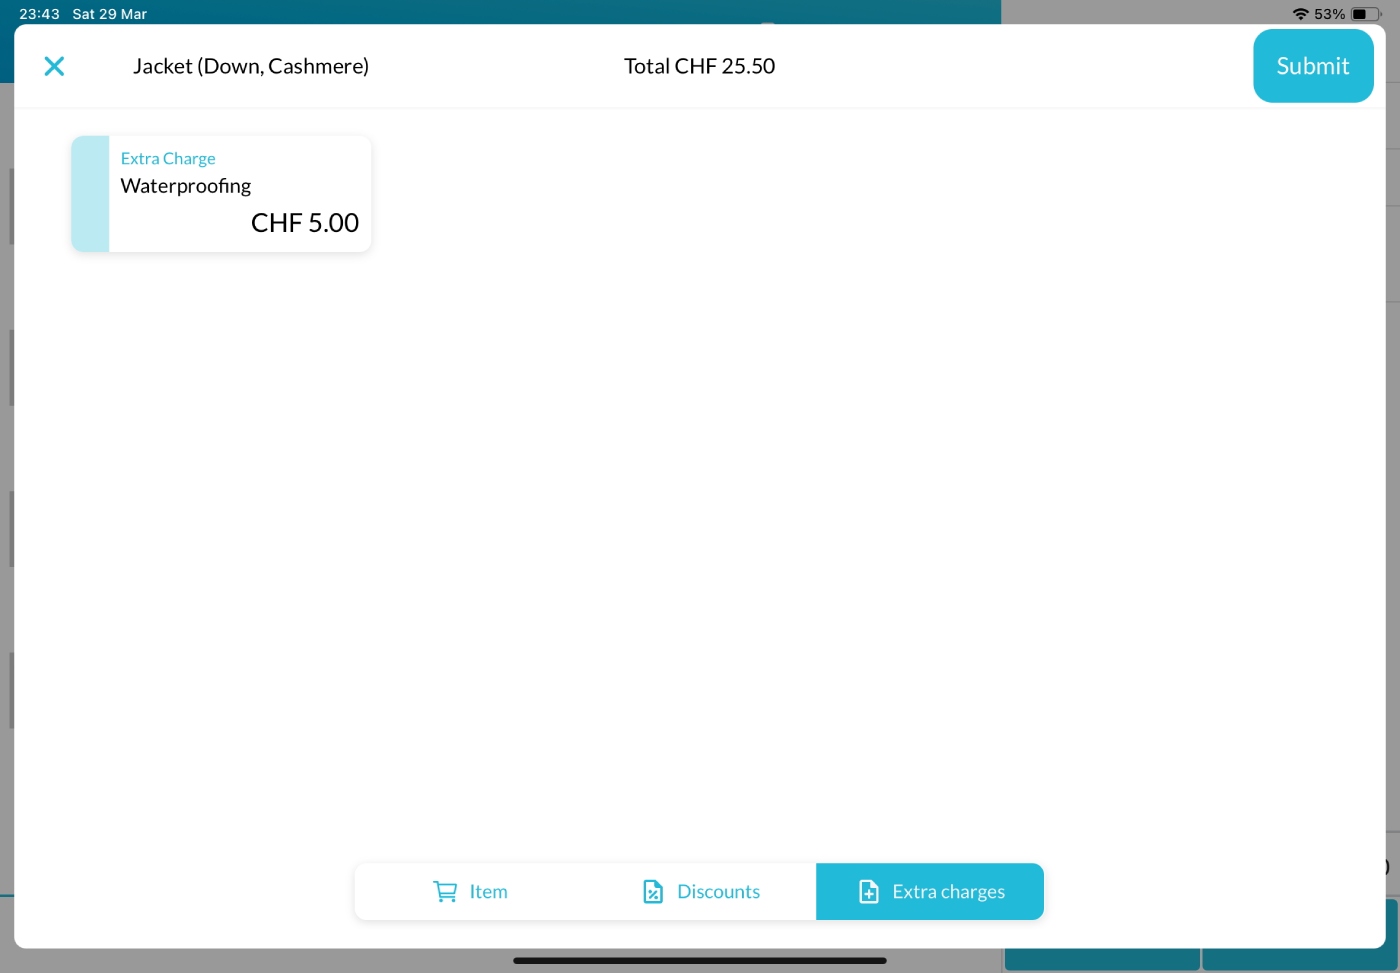
- Select one or multiple extra charges as needed. Selected once will be highlighted.
- The applied extra charges will automatically be multiplied by the quantity of the item set in the Item Details window.
For example, if you apply a Waterproofing charge of 5 CHF to 3 jackets, the total extra charge will be 3 x 5 CHF = 15 CHF.
Once configured, click the Submit button to add the item and its extra charges to the cart on the right side of the Sales Page.
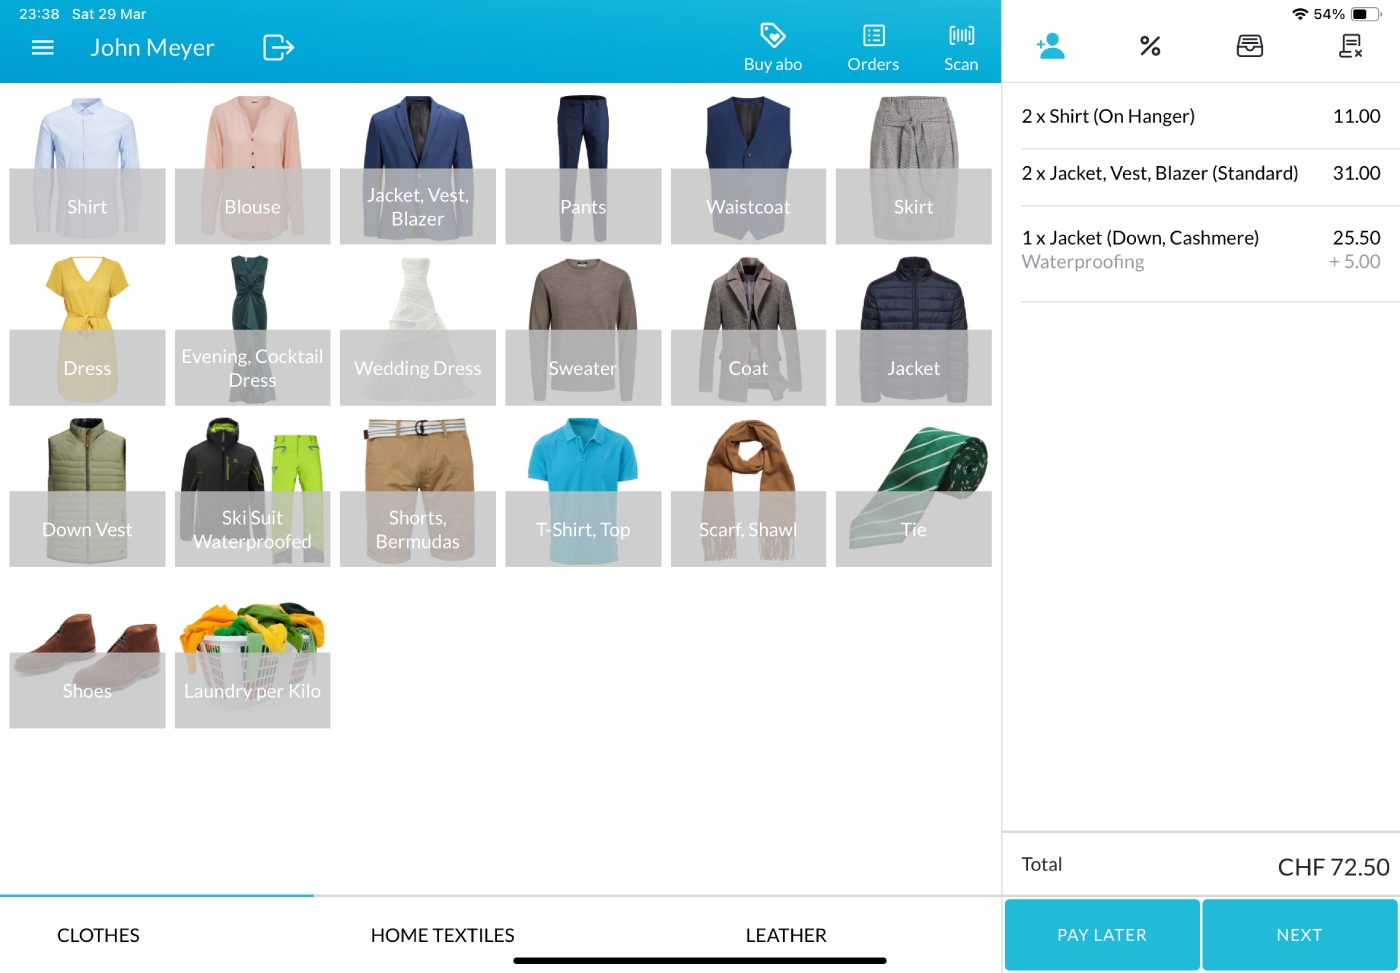
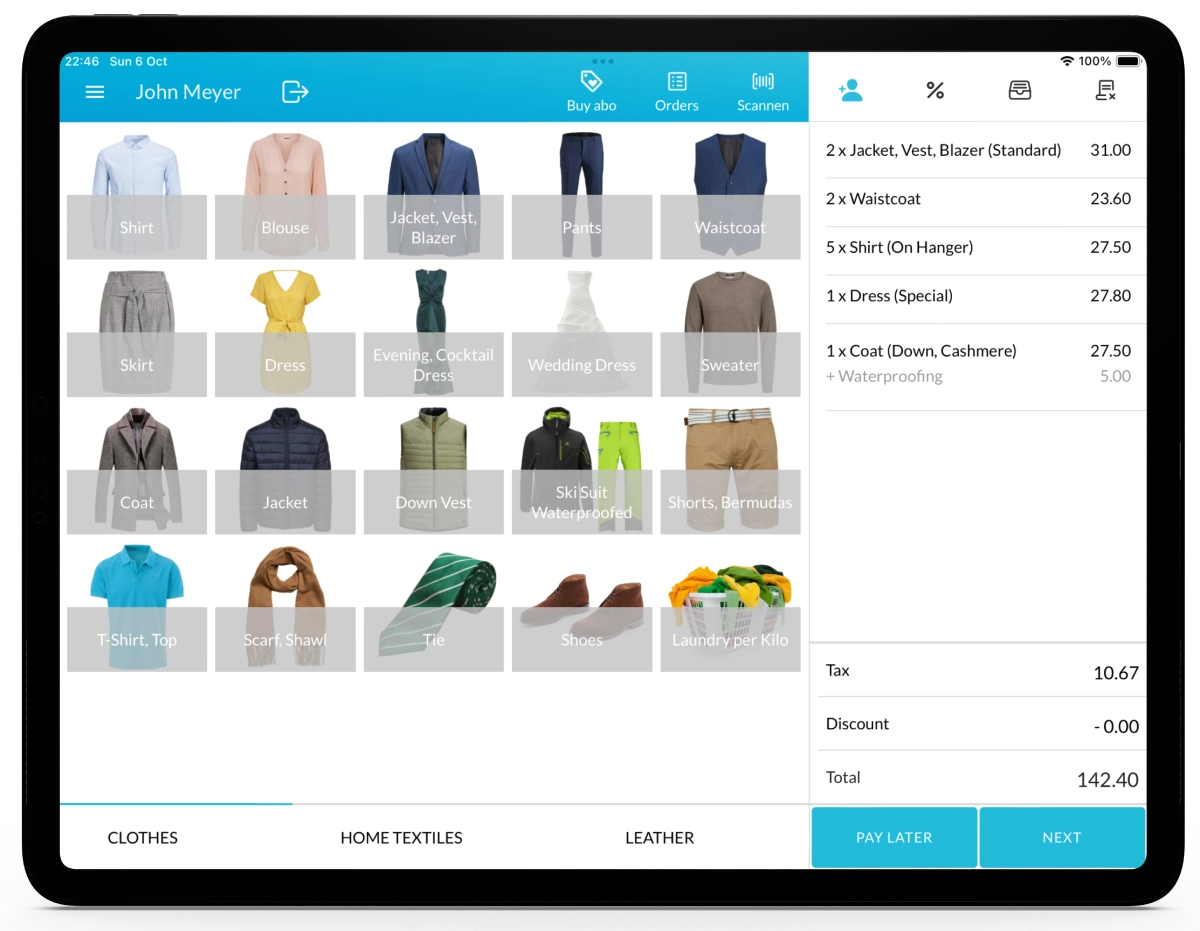
After adding the item to the cart, you’ll see the following:
- The item name with the selected extra charge(s) listed below it.
- The price of each extra charge displayed on the right side of the cart.
- Extra charges will also be printed on the customer receipt and, if configured, on the item tags/labels.
Continue with the order process, such as selecting a pickup date or payment method. Learn How to Create a New Order